Pretzel Rolls – Good for What Ails Ya

The HomeOwner Family took a Caribbean cruise a few years ago that left from New York.  The reasoning was that we would save the airfare and start relaxing right away.  What we hadn’t planned on was an Atlantic hurricane which we managed to skirt around, but the seas were pretty rough.  It was so rough, in fact, that the crew of the ship had been thoughtful enough to put little water-proofed bags on every flat surface of the ship and most of the passengers were availing themselves of them.  HomeOwnerMan was o.k. having hardened his innards on the decks of the CasBar I and the CasBar II for many years.  WifeGirl and SonBoy, however, were looking pretty green around the gills and couldn’t eat.  We had chosen “FreeStyle Cruising” because it was our intent to eat our way from 1 aft to 10 forward, but mother nature had different plans.

DSCN2346DSCN2347

Anyway, the weather started to break and WifeGirl and SonBoy had not had anything to eat in about 24 hours. On the buffet we came across pretzel rolls.  They were pleasing to the eye, and seemed like something that might go down easily.  They were right; these things were fabulous.  We had to make them when we got home.

We started looking for recipes and testing them from that day on.  Here’s the best one we’ve found, with credits at the bottom and my notes.

I will say this requires a fair amount of time and effort.  If you are new to baking bread, don’t start with these.  But if you’ve kneaded a loaf or two in your day, give them a try.

20150405_153926

Pretzel Rolls

Ingredients
1 tablespoon instant yeast
2 tablespoons canola or vegetable oil
2 cups warm milk (about 100-110 degrees F)
1 1/2 cups warm water (about 100-110 degrees F)
2 teaspoons salt
6 1/2 – 8 cups unbleached all-purpose flour
3 quarts water
[1 tablespoon sugar
1/4 cup baking soda]
Baker’s lye – 2 teaspoons per quart of water for blanching
Coarse salt for sprinkling
Directions
1. In the bowl of an electric mixer (or you can do this by hand in a large bowl), stir together the yeast, oil, milk and water. Add the salt and two cups of the flour. Add the rest of the flour gradually until a soft dough is formed and knead for 3-4 minutes. You may not need to use all the flour depending on many different factors (see the note) – add the flour until a soft dough is formed that clears the sides of the bowl. It is similar in texture to bagel dough and should be slightly more stiff and less sticky than, say, roll dough, but definitely still soft and not over-floured.

2. Transfer the dough to a lightly greased bowl, cover it with greased plastic wrap and let it rise until doubled in size (1-2 hours).
3. Portion the dough into 16 pieces and roll each piece of dough into a lovely little round ball.
4. Lay out the rolls on lightly greased parchment or a lightly floured counter. Make sure the dough balls won’t stick! Let them rest for 15-20 minutes.

5. While the dough rests, bring the water, [sugar and baking soda] and Baker’s lyeto a boil in a large 5-6 quart saucepan.

6. Working with one piece of dough at a time, carefully take it off the parchment or counter, flip it over in your hand and pinch the bottom to form a little pucker and help the dough form a nice, taut ball. Take care not to deflate the dough; you should pinch just the very edge of the dough.

7. Place 3-4 dough balls in the boiling water and boil for 30 seconds to 1 minute on each side (the longer you boil, the chewier the baked pretzel roll will be).

8. With a spatula, remove the dough from the boiling water and let the excess water drip off into the pan. Place the boiled dough balls onto lined baking sheets (lined with lightly greased parchment or a silpat liner).

9. Preheat the oven to 425 degrees F.

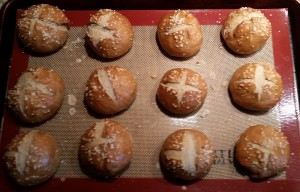
10. Using a very sharp knife or razor, slice 2-3 cuts into the top of each unbaked roll about 1/4-inch deep or so. It’s important to use a very sharp blade so that it cuts the dough without deflating it. It’s ok if the dough looks wrinkly and kind of funny. It will work itself out during baking. Lightly sprinkle each dough ball with coarse salt.

11. Bake for 20-22 minutes until the rolls are deep golden brown. These rolls definitely taste best the same day they are made; however, lightly warmed in the microwave for a few seconds will do wonders for pretzel rolls 1-2 days old.

http://www.melskitchencafe.com/2013/10/amazing-soft-pretzel-rolls.html

I use the following for a smaller batch:

1 tablespoon yeast
2 teaspoons canola oil
3/4 cup milk
3/4 cup water
1 teaspoon salt
3 1/2-4 cups flour
wheat and white 1:3.

[I do an egg wash (one egg and 2 tablespoons water, beaten well and brushed on liberally) after blanching to improve the appearance and crust. -blanching in lye eliminates the need for this step]
Pierogies – The Fuel That Makes the Superhero Go

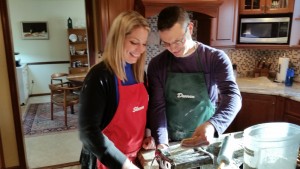
WifeGirl and HomeOwnerMan work very well in the kitchen together.  WifeGirl is usually the Master Chef, while HomeOwnerMan is comfortable in his role as Sous-Chef.  There are a few notable exceptions to this rule, however.

Pierogies have been in my family for as far back as we can remember.  My mother learned from my grandmother, and I learned from both of them.  So, when it comes to pierogies, I am generally in the driver’s seat here.  Which suits WifeGirl just fine; she has enough running things the rest of the time.

20150111_152716 - Copy

The great thing about pierogies is that they are something that does not follow the rule “Too many cooks spoil the broth.”  In fact, there are so many jobs involved that it makes for a very social time to make a large batch.  Over the years I have made them with many friends, and we started to have PierogiFest every year because of the social aspect of it. Throw in some prosecco and you’ve created a whole new tradition.  In fact, we have learned that we prefer to hold some sort of event when we have people over rather than to just entertain for the sake of entertaining.  It has been received well.  We did a scotch tasting a couple of years ago, for example.  This was popular with scotch lovers and novices alike because it gives everyone a sense of purpose and belonging.

Anyway, here are the pierogies as my family makes them, and including a few things I’ve learned over the years.

Pierogi Recipe

Notes from 2017 Pierogifest: We used the pasta roller on a setting of 3, but 4 probably would have been better, because a lot broke. Remember to not overfill them. 5 cups of flour = 25 oz if using a scale. I found you can start the recipe with 30 oz flour per batch of dough. If you add the liquid ingredients together and mix them well, you can put the full 30 oz of flour in at once and the dough hook will do a great job of getting it mixed and pliable, with only small amounts of added flour needed.

From “The Frugal Gourmet on our Immigrant Ancestors” and my Grandmother Anna Semanko Dzwonczyk

(This is really light and tasty dough which uses sour cream as the liquid element.  I make mine in a mixer one batch at a time.  Each batch makes about 7 dozen pierogi.)

2 cups sour cream

5 cups all—purpose flour

2 tablespoons melted butter

2 eggs plus 1 egg yolk

2 teaspoons salt

2 tablespoons vegetable oil

In a large bowl, mix all the ingredients and knead into soft, pliable dough, adding flour until it is no longer sticky. Cut in half, and let rest, covered, for about 10 minutes. Roll out each half into a thin circle. Using a drinking glass cut the dough into circles and fill them with the desired filling. Place less than a tablespoon of filling in the center of each circle and fold over. Wet the edges with a little water, and press into a half moon. Seal with a fork. Cook for 20 minutes in boiling salted water. Drain. They can be pan—fried in butter at this point, if you wish, for a really tasty finish.

CAM00453_edit0

***A couple of suggestions and hints from watching Anna Dzwonczyk do this:

  • She cut her dough into 3” squares and folded them over into smaller triangles. (I prefer the circle/half-moon technique myself).
  • Roll the dough out pretty thin, like 1/8 or 3/16”, in other words, as thin as possible without “filling herniation”, and liberally flour the dough as you roll it out.
  • Rather than pan-frying the pierogies, cover the boiled pierogies in melted butter and browned onions.
  • If you are freezing them for future use, don’t make one big hockey puck like Paul Sleph and I did one time.  Here’s what you do: Sprinkle cookie sheets with a liberal amount of corn meal.  Lay out the pierogies in rows across the pan (or columns down the pan if you think they’ll taste better.) Freeze them until they are set, and then bag them in labeled plastic bags.
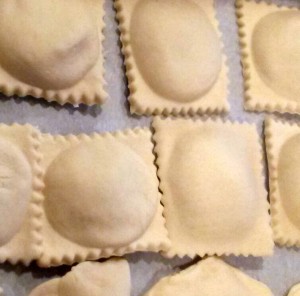
  • I use a pasta roller and ravioli forms to make the pierogies.  This makes the pierogies more uniform so that they all cook at the same rate.  If you are doing it this way, start at the thickest setting, adding flour with every pass and getting down to a thin setting (3 on my machine).  Place the dough over the ravioli form, fill them, wet the seams, and lay the 2nd piece of dough over it.  Seal them by passing a rolling pin over them.  Poke a single toothpick hole in each one to allow trapped air to escape when cooking.  This keeps them from bursting.

Anna’s favorite Potato and cheese filling:

3/4 lb. sharp orange cheddar cheese, grated

3 potatoes, peeled, boiled, and mashed

While the potatoes are still hot, add the cheese and mix together well. Cool in the refrigerator until room temperature or below. Fill pierogies.  This will fill about 7 dozen pierogies.

Anna’s prune filling:

(I know this sounds gross, but I guarantee you’ll like it.)

1 box pitted prunes

1 tablespoon sugar

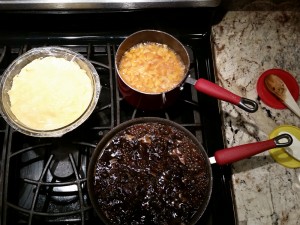
Stew the prunes until soft in a saucepan in just enough water to cover them. Drain. Add about 1 tablespoon of sugar, and mash the prunes until they become a thick paste. Use as filling.  This will fill about 3 dozen.

IMG_20150110_205710 - Copy

Barbara Gatta (of Brooklyn)’s apricot filling:

(my personal favorite, and Florence’s too)

1 pkg of dried apricots

~1/4 cup sugar

Stew the apricots, in just enough water to cover them, until soft. Add the sugar (more or less to taste) until the mixture is sweet. Mash. Use as filling.  This will fill about 3 dozen.

Florence Dzwonczyk’ and Paul Sleph’s Sauerkraut Filling

1 14 oz. can of Sauerkraut

¾ bottle beer.

Empty the sauerkraut into a sauce pan and add the beer.  Finish the beer.  Heat the sauerkraut for 10 minutes on medium heat.  Allow to cool, and then drain thoroughly through a colander. Use as filling.  This will fill about 3 dozen.

Joann Strnad’s Suggestion – Pumpkin Filling

1 3lb. pumpkin, roasted, seeded, pureed, and drained (will amount to about 2 cups. You can also use canned pumpkin if you want – the color will be a lot bolder. Substitute squash, or even yams or sweet potatoes, if you like.)

1/2 cup chopped cooked bacon

2 whole heads of garlic, roasted until soft and dark golden

1/2 cup grated Parmesan cheese

1/2 tsp. pepper

1/4 tsp. nutmeg

Salt, to taste

I used a food processor, but you don’t have to. I prefer a uniform texture in my pierogies, and this is the easiest way. You can just mash everything together if you like – that’ll work perfectly well too.

Combine pumpkin, bacon, garlic, cheese, pepper, and nutmeg. Mix well, then taste. Adjust your seasonings if need be. This would be the time to add salt if you feel like it.

Before there was HomeOwnerMan, there was Pretzel King

A long, long time ago in a kingdom far, far away there was a family with six children.  The youngest of these was a little boy who was so starved for attention that he would go to great lengths to be noticed by his family.  He tried comedy acts which brought brief attention but required long hours of dreaming them up, planning them, finding the appropriate time to perform them, and making them look spontaneous.  (I should mention that the little boy is older now but still devotes a fair amount of time to this.)

Observing his youngest sister on a few occasions, who was equally starved for attention and was further saddled with middle child syndrome, he noticed that she started making a coffee cake recipe which, although it took some time, brought with it praise an accolades from the other family members.  They started heaping praise on her and spontaneously giving her attention by requesting that she make the coffee cake when they were hungry for something homemade.

So the little boy got an idea.  He found a soft pretzel recipe and tried it on his family.  The recipe took some time and a great deal of effort and the pretzels were somewhat dense, but the family loved them.  They started giving him attention.  He started making the pretzels more often.  All was good.

But soon the boy realized it was a lot of work, and so he wouldn’t make the pretzels when the family asked.  But they were clever.  They started saying things like, “we’d make them, but they don’t come out as good as yours.”  That worked for a while, and even stirred the boy into improving his own recipe.  He looked up other recipes.  He experimented with the recipe.  He got advice from his grandmother, who was an expert at all sorts of breads and foods.  The pretzels gradually became lighter and of better quality.

But again, he began to resist the effort of making them.  Until one day when a sister, much older and more clever than he, came up with a new strategy.  She began calling him “Pretzel King”, and began saying things like “Pretzel King makes the ~best~ pretzels” and spinning yarns about “the Pretzel Kingdom” and his “Pretzel subjects.”  He so loved these stories that he went back to the kitchen to again make pretzels, passing the time and work with visions of his kingdom.  The stories became more fanciful; the pretzels reached a pinnacle.  The little boy had truly become “The Pretzel King.”

For many years the Pretzel King guarded his recipe, keeping it close and modifying it only slightly.  In the advent of bread machines the most laborious part, kneading the dough,  became much simpler.  Later, he even added the use of commercial style mixers to the process.  But now, for all to make, is the Pretzel King’s secret recipe.

Enjoy them.  Make them for your family.  Have your own fantasy kingdom.

soft_pretzel

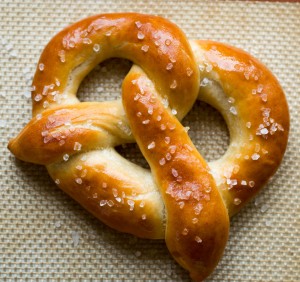
Soft Pretzel Recipe

Dough Ingredients:

1 ¼ cup water (warm)

2 tablespoon Margarine

1 tablespoon Sugar

1 teaspoon Salt

4 cups flour (or 2 cups whole wheat and 2 cups white)

1 tablespoon yeast


Preparation ingredients:

¼ cup baking soda

1 egg

¼ cup Kosher Salt


In a bread machine add dough ingredients in order, or if kneading by hand, put the water, melted margarine, yeast and sugar in the bottom of a large glass bowl and mix until dissolved.  Allow yeast to activate for 5 minutes.  Add flour gradually, mixing well until it becomes too thick to mix.  Then knead in the rest of the flour and add more until the dough is no longer sticky.  Work the dough hard for 3 – 4 minutes until smooth, then set aside in a bowl in a warm area to rise for 30 min to an hour.

Pre-heat oven to 375° F.  Divide the dough into 12 equal parts.  Roll each dough ball into a 18” x ¾” rope, and twist into traditional shapes or braid into tiny loaves or wreaths.

Boil 4 cups of water and add ¼ cup baking soda.  Blanch the pretzels in the solution until they float to the surface, and remove them with a slotted spoon.  Place them on cookie racks to drip dry.  Move them to cookie sheets.  Prepare an egg wash by beating the egg with 2 tablespoons of water.  Brush liberally on each pretzel.  Sprinkle kosher salt on them to liking.  Bake for 20-30 minutes until they are golden brown.  Cool on cookie racks or eat while still warm.